Pages

Saturday, June 15, 2013

101 different uses for washi tape - number 4

Hi there!

On my very first "101 different uses for washi" post, a friend Julie left a comment asking if this truly was a new series, or whether it was just a one off post. I said I'd try my best to make it to 101, and I'm slowly making my way into double figures!

Number 4, now I have a choice for this - I shall go with the less gory one. Beware, the next post will be ever so slightly yucky.

When die cutting stamped images/fussy cutting patterned paper, it's diffifcult to keep your die in the right place if you haven't got one of those new-fangled magnetic cutting platforms. This is where washi tape comes in.


I used it to tape my die to the card and the cutting plate, before turning it over and running it through my Cuttlebug. This way, I could make sure that the image was cut out exactly the way I wanted it. The beauty of washi tape is that it peels off easily without tearing strips off the surface means that I don't end up swearing at myself, which would clearly ruin my precious crafting time!

Have you got any other suggestions to help me reach 101? I'd hate to have to fall back on actual creative uses!

Wednesday, June 12, 2013

July 4th 2013 - Card Class

If you're in the Dronfield area in the evening of July 4th 2013, you might find this flyer of interest...

Let me know if you're up for joining us, we'd love to see you at Magpie Makerie!

Sunday, June 2, 2013

101 different uses for washi tape - number 3

When your darling daughter comes to you with the latest Scooby Doo comic, and asks you to help her make the project in it...


the coffin pencil case project...


you can rest assured that when you tape the cardboard together with washi tape, you will be able to totally cover it with poster paint. Something that cannot be said for sellotape or standard masking tape!

What's the weirdest thing you've been asked to make for a loved one? Do tell!

Tuesday, May 28, 2013

Painted love

Hi there, nice of you to pop by!

Today I'm sharing my latest scrapbook layout inspired by the Sarah's Cards May challenge here.


It's a couple of photos from this time last year, which show my youngest daughter enjoying painting. We love getting messy in our house, and we're often found in our PJs on the weekend making stuff at the dining room table.


I've replaced the triangles on the sketch with a strip of pennants/bunting, and embossed a couple of the plain pieces of card. I've been really stingy with the patterned paper - the scraps behind the pictures are actually the remnants of the paper I cut the bunting out of!


It's a lovely fresh colour combo, taken from my favourite patterned paper at the moment, the floral one shown here. No journaling though, I'm just showcasing the photos.


And the title? It's one of those that popped into my head - I often use song lyrics in my titles, even if they are a little... altered!

How do you choose your scrapbook layout titles? Do tell ;)

Wednesday, May 22, 2013

This and That - the Wedding Planner

Helloo! How are you, on this fine spring morning? Oh, is it raining where you are? I'm sorry. Here, have some of my sunshine, I expect it won't last long!

A couple of posts ago, I mentioned that I was going to be using This and That for keeping all the bits and bobs that I'm bound to collect when planning my forthcoming wedding. I have never daydreamed about a dress, or who I'd invite, or where I wanted to get married, namely because I come from a family with a lot of divorce, and I could never envision finding someone who I would actually want to spend the rest of my life with!


Then I met Al (or re-met him, as we used to know each other when we were teenagers), and to cut a long story short, got together, spent 4 happy years together, then had two children and spent the next six years walking around in a sleep-deprived, skint state!


Anyway. Back to the This and That. I always get a bit intimidated when I see a whole load of pretty paper. I never want to cut it up. But one of the things I love about the Stampin' Up range is that they are all double sided,and you get two sheets of each pattern in the set. So, to get over the fear, I immediately separated out one of each of the sheets and cut them into two 4x6 and two 8x6 sheets. The other whole sheets are being kept in case I want to make 12x12 scrapbook layouts with them.


The 4x6s went in the little pocket at the back of the journal with the sticker sheets, ready for punching, stamping or tearing. The other sheets just got put in the back.


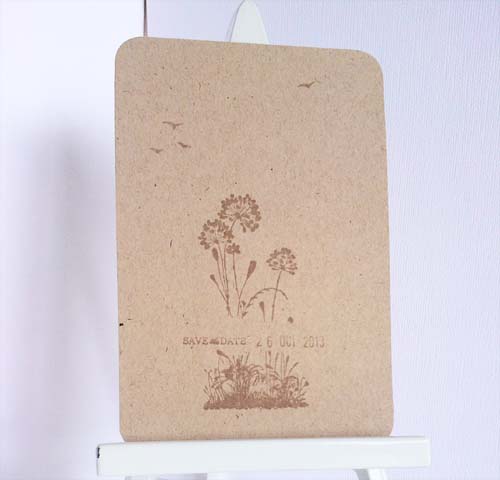
I then stuck my rough of the save the date card in, with some of the co-ordinating washi tape and one of the stickers. Then out came my trusty bitty butterfly punch, just to pretty it up.


The letter stamps I used for the journalling are the best buy I have ever had. They were in a bargain bin at a local craft shop, and I swear I've used them more than any other stamp set I've had.


I then used the ledger paper to record our guest list. It's very small, because if we wait 'til we can afford to invite everyone, then we will NEVER get married. So we're planning on having a big party next year for the rest of the people. Perhaps I will need another TaT book for then!

I was a little concerned that with the slightly thicker embellishments I was using (the bead on the butterflies and the pearl accents on the flowers) that the journal would be too bulky. But as can be seen from the side view, there is plenty of room to expand with the generous spiral binding!


I'm still waiting on those tips for a smooth, hassle-free wedding ;) Do tell...

Tuesday, May 21, 2013

101 different uses for washi tape - number 2


Use your rolls of washi tape to fill a Le Creuset Salt Pot that you bought in TKMaxx just because it was your favourite colour and was very, very reasonable! What? You haven't got one? Ah. That'll be just me then.

Next time, I promise to have a more universally useable tip!

Monday, May 20, 2013

Rotary stamps are us!

Well hello there!

I did mention the other day that I was rather keen on a certain new rotary stamp from Stampin' Up (see here if you have no idea what I am talking about). I also mentioned that I'd let you see the masked card I was working on. Well..... *drum roll*.... tada!


Here we have a very simple but effective save the day card. I used a 4x6 piece of kraft card, one ink colour, one corner rounder punch and three stamps (all from Stampin' Up - message me if you want details). They literally took me 5 minutes to make 24, once I'd decided on the design, and have saved me a few more pennies to put towards the day itself.

Yes, that's right - it's my save the date card! I'll print the actual details on the reverse of the card, pop them in their envelopes and send them off sometime this week.

I'll soon be sharing my first two pages in my new This and That book, which has been earmarked for organising and recording all the bumf I expect I'll collect over the next five months!

So, for anyone who's done this (getting married) before, here's the time to pass on your handy hints and tips, tricks and things to avoid!  Go on, you know you  want to!

Thursday, May 16, 2013

101 different uses for washi tape - number 1...

... to hold down your stamping mask in a secure yet easily-removable-without-ripping-the-card manner.


If you haven't seen masks before, they're a way of keeping a clear area on your stamp design, say, for a sentiment like the above one will be. You can also use them to protect areas that have been previously stamped if you want to build up more stamped images. I'll show both of these in my next post!

And the above image? It shows a few of my latest Stampin' Up purchases. Washi tape and Serene Silhouettes stamps. Check back tomorrow for my latest project with my new love - the This and That rotary stamp:

This is going to get used so much - I have a regular date stamp from Staples, but this has phrases as an added extra. I reckon you could easily use the phrases alone, so am going to have a little experiment!

See you tomorrow, but if not, have a fantastic weekend!

Monday, May 13, 2013

One basic QCAS design, three levels of pretty!

A very happy Monday to you (and to my  US readers, Happy belated Mothers' Day).

I've got a lovely little illustration here of how you can take one quick, clean and simple (QCAS) card design and add a bit more oomph to get another two designs. The basic card design is very similar to my QCAS card here, from last week, with the patterned paper mounted on dimensional foam stickers to raise it off the front (supplies listed at the end of the post).


 I used the punched out shape, flipped it over and punched another contrasting colour to create the trio. I love using the visual triangle in my designs - three is indeed the magic number! (thanks De La Soul).

The main sentiment was stamped on the flipped patterned paper, and the plain card label was pierced to add interest. I then stamped "soon" in the recess, and added "..." after the "Get Well". The recessed shape has also been pierced around, but it is difficult to see this on the patterned paper.


To take it up a level, you could add some "bling"- I've used teeny pearls as accents, highlighting the visual  triangle once again.


Or, if you have more time, and the inclination, you could add some die-cut leaves, a few flowers and use the pearls as the flower centres. This card is winging its way to my Great-Aunt who is recovering after an operation, but it's definitely  a design I will reproduce! 


If you have a go, please let me know in the comments below! I'd love to see what you come up with.

Stampin' Up supplies: "Twitterpated" designer series patterned paper,  "Rose Red" card stock, "Wild Wasabi" card stock, paper piercer, decorative label punch, "Perfectly Penned" sentiment stamps, "Little Leaves" Sizzlits die, Pearl Basic Jewels, StazOn Ink Pad, SNAIL adhesive - All available from me - 10% off your first order over £30, free postage on orders over £50! Contact me on: themagpiemakerie@hotmail.co.uk, or phone 07708949170.


Friday, May 10, 2013

Decisions, decisions!

Hi there! Happy Friday. I hope you've got something good planned for the weekend?

Me? Well, if I get some crafting time, I want to document the story behind this photo:


The difficulty is, do I scrapbook it? Or try another art journal page? Oh deary deary me! #firstworldproblem

So, what are you up to this weekend? Do tell ;)